Posted on Leave a comment

Writing an Arduino Library

Have you ever written some code that you thought would make a great library but didn’t know where to get started? This tutorial will be perfect for you!

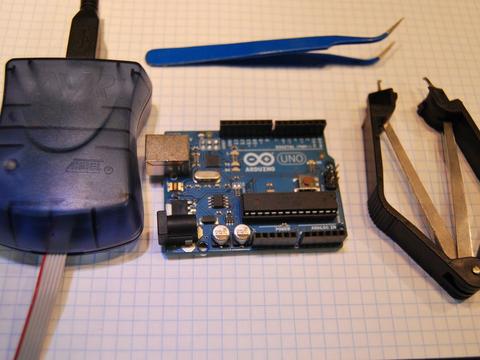
If you haven’t used libraries before they provide a really simple way to extend the functionality of the Arduino environment. For example there are libraries that make it very easy to connect to Ethernet, control servo motors or even work with LCD displays.

Writing a library

So how do you create your own library? First you will need to create two files, one header file (.h), which lists everything that is inside the library, and the source file (.cpp) which contains the actual code. After this you will need to take your existing sketch and appropriately fill out the header and source files. Fortunately this is quite a simple process and there is a great example available on the Arduino website.

Want to keep in the loop about the latest in home automation? Subscribing to SuperHouse Automation on YouTube is the best place to start!

Inspired to start work on this project? Are you working on a project you would like us to feature in this blog? The team at SuperHouse Automation would love to know! Tell us about it in the comments section below or on Facebook and Twitter.

Posted on Leave a comment

Arduino Interrupts

Interrupts are a fantastic tool to help increase the efficiency of your Arduino code and are typically very underutilized! So what exactly is an interrupt? In simple terms, interrupts are a mechanism found on Arduino (and many other microcontrollers) that simplify the process of reacting to real time events. This is achieved by constantly monitoring the status of a pin and immediately executing code, interrupting whatever was currently running, when the state of a pin changes (or on a rising or falling edge as desired). As you can imagine, this is significantly more efficient than having to wait for your code to reach the specific line where it checks the status of an input, and it frees up your Arduino to focus on other tasks rather than monitoring the state of a pin. To learn more about interrupts and how you can use them in your projects check out the video below from Core Electronics.

Want to keep in the loop about the latest in home automation? Subscribing to SuperHouse Automation on YouTube is the best place to start!

Inspired to start work on this project? Are you working on a project you would like us to feature in this blog? The team at SuperHouse Automation would love to know! Tell us about it in the comments section below or on Facebook and Twitter.

Posted on Leave a comment

DIY Soldering Station

Most hobbyists start off with a cheap and nasty soldering iron which takes minutes to heat up, and provides no temperature control. Whilst a decent soldering station is a significant upgrade from a typical beginners iron, the cost can be prohibitive. Thankfully, GreatScottLab has put together a great instructable detailing how you can build your own fully controllable soldering station.

The parts required to build a DIY soldering station.

Not only is building your own significantly cheaper than buying a soldering station, but the process of building the electronics and 3D printing the enclosure provides a fantastic educational opportunity! To find out more about how you can get started building your own soldering station checkout the following link.

Want to keep in the loop about the latest in home automation? Subscribing to SuperHouse Automation on YouTube is the best place to start!

Inspired to start work on this project? Are you working on a project you would like us to feature in this blog? The team at SuperHouse Automation would love to know! Tell us about it in the comments section below or on Facebook and Twitter.

Posted on Leave a comment

Using a Camera Sensor with Arduino

It is easy to imagine that incorporating a camera into an Arduino project would be far too advanced for the average hobbyist! However, with the advent of many low cost and easy to use camera sensor modules such as the OV7670, the barrier of entry has been significantly lowered. Mybotic has put together a great instructable explaining how you can wire up the OC7670 camera to your Arduino, and set it up to take photos which are loaded straight onto your computer using the Arduino serial port. To find out more check out the following link.

Arduino Camera Sensor

Want to keep in the loop about the latest in home automation? Subscribing to SuperHouse Automation on YouTube is the best place to start!

Inspired to start work on this project? Are you working on a project you would like us to feature in this blog? The team at SuperHouse Automation would love to know! Tell us about it in the comments section below or on Facebook and Twitter.

Posted on Leave a comment

Programming the ESP8266 from the Arduino IDE

The ESP8266 is an extremely popular, low cost WiFi module which is widely used in DIY hardware hacking community.

ESP8226

The module provides one of the easiest ways to add WiFi to an Arduino project and as a result of it’s popularity there is a plenty of help available online if you get stuck! Whilst the ESP8266 can be used in combination with an Arduino, you can also use it as a stand alone microcontroller. Fortunately programming the ESP8266 as a stand alone board is quite straightforward and is even possible through the existing Arduino IDE. To find out more about how you can do program your ESP8266, checkout the following tutorial.

PIN OUT

Want to keep in the loop about the latest in home automation? Subscribing to SuperHouse Automation on YouTube is the best place to start!

Inspired to start work on this project? Are you working on a project you would like us to feature in this blog? The team at SuperHouse Automation would love to know! Tell us about it in the comments section below or on Facebook and Twitter.

Posted on Leave a comment

Fixing a Blown Arduino

Although Arduino boards are typically quite robust, things can still go wrong, especially when used by total beginners. One of the most catastrophic problems that can occur is totally burning out the ATmega microcontroller which is the brains of most Arduino boards. Fortunately this scenario doesn’t have to mean the end for your Arduino board and can actually represent a fantastic learning opportunity! With this tutorial from make you can learn how to replace a burnt-out ATmega in your Arduino board and upload the bootloader using an AVR ISP programmer, so that the new ATmega functions just like an Arduino. This sure beats purchasing an entirely new board!

Blown ATmegas can be replaced!

If you are looking for an ICSP AVR programmer look no further than the Freetronics USBasp! The programmer has a USB interface and allows you to program bootloaders or firmware on a wide range of microcontrollers including the ATmega which is used in Arduino boards. To find out more and to order checkout the following link.

Want to keep in the loop about the latest in home automation? Subscribing to SuperHouse Automation on YouTube is the best place to start!

Inspired to start work on this project? Are you working on a project you would like us to feature in this blog? The team at SuperHouse Automation would love to know! Tell us about it in the comments section below or on Facebook and Twitter.

Posted on Leave a comment

Arduino Word Generator

Whilst ATmega microprocessors are fantastic for use in Arduino boards they can also be used on their own, which can simplify projects a lot! One great example of this is a word generator created by duino4projects. The project uses an ATmega168 to generate the words and prints them on a 4 digit-16 segment display. To find out more about this project check out the following link.

Arduino Word Generator

If you are looking for an standalone ATmega microcontroller checkout the Freetronics ATmega328P which is the same chip used in our Eleven and EtherTen. The ATmega328P is perfect for building your only Arduino compatible project directly on a breadboard or custom PCB. For more information and to order checkout the following link.

ATmega

Want to keep in the loop about the latest in home automation? Subscribing to SuperHouse Automation on YouTube is the best place to start!

Inspired to start work on this project? Are you working on a project you would like us to feature in this blog? The team at SuperHouse Automation would love to know! Tell us about it in the comments section below or on Facebook and Twitter.

Posted on Leave a comment

Sound Generation

Regardless of what type of electronics project you are working on you will likely have to provide feedback to your users about the status of the system. Typically this can be done visually using LEDs or small displays. However, another great way to provide user feedback can be through sound. This might be as simple as a quick “beep” to indicate that the fridge door has been left open, or as complex as providing background music for a game! Thankfully adding sound to your projects is actually quite easy! The best way to get started is to checkout the following guide.

Sound

Want to keep in the loop about the latest in home automation? Subscribing to SuperHouse Automation on YouTube is the best place to start!

Inspired to start work on this project? Are you working on a project you would like us to feature in this blog? The team at SuperHouse Automation would love to know! Tell us about it in the comments section below or on Facebook and Twitter.

Posted on Leave a comment

Motion Sensing Water Gun

During the warm Australian summer months there is nothing more refreshing than a water fight! James Cripps’s, motion sensor water gun you can make sure you always emerge from these fights victorious. The water gun uses a motion sensor and an Arduino to fire the gun anytime motion is detected. The instructions James provides are very thorough so you should have no problem getting started building your own water gun.

Water Fight

Want to keep in the loop about the latest in home automation? Subscribing to SuperHouse Automation on YouTube is the best place to start!

Inspired to start work on this project? Are you working on a project you would like us to feature in this blog? The team at SuperHouse Automation would love to know! Tell us about it in the comments section below or on Facebook and Twitter.

Posted on Leave a comment

Repairing Pinball Machines with Arduino!

One of the great thing about electronics is that they can be used for millions and millions of different applications. Recently we came across James, a pinball machine repair enthusiast! James has used an Arduino and two freetronics N-Drive Shields to control all of the lights and action on one of his pinball machines.  You can checkout some pictures of James’s projects below.

Pinball

Pinball

Want to keep in the loop about the latest in home automation? Subscribing to SuperHouse Automation on YouTube is the best place to start!

Inspired to start work on this project? Are you working on a project you would like us to feature in this blog? The team at SuperHouse Automation would love to know! Tell us about it in the comments section below or on Facebook and Twitter.