Posted on Leave a comment

Arduino Pulse Width Modulation

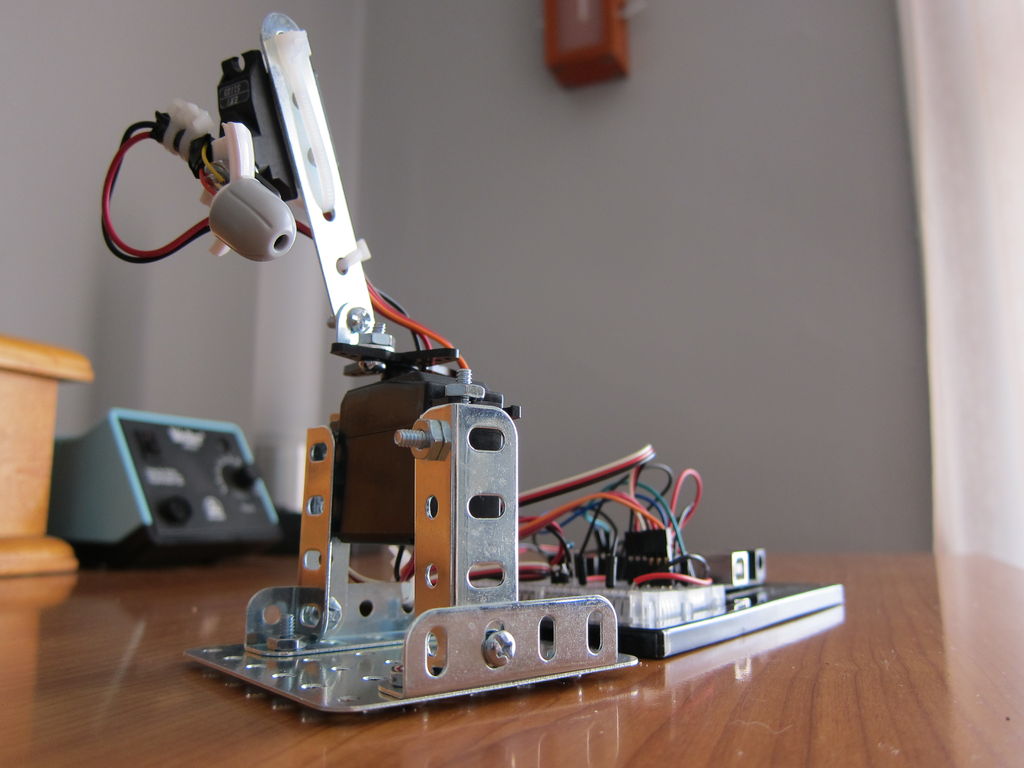
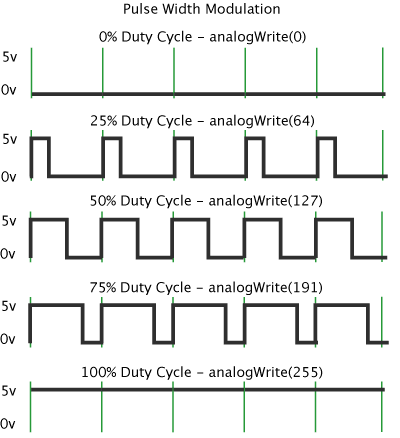
Using the digitalWrite() function in Arduino it is very simple to turn an output pin on or off. However, what if we want to alter the speed of a motor or dim an LED? This is where Pulse Width Modulation (PWM) can be really useful. By rapidly switching a signal high and low, and varying the proportion of time that the signal is high we can digitally emulate analog results! To find out more about this very useful function checkout the full tutorial or the helpful diagram and video example below.

Diagram - PWM

Want to keep in the loop about the latest in home automation? Subscribing to SuperHouse Automation on YouTube is the best place to start!

Inspired to start work on this project? Are you working on a project you would like us to feature in this blog? The team at SuperHouse Automation would love to know! Tell us about it in the comments section below or on Facebook and Twitter.

cropped-SuperHouse-LogoOnly-512x512.jpg

Posted on Leave a comment

Impressive N-MOSFET Powered Artwork

At SuperHouse we always love to see amazing electronics projects that are created around the world. We recently read about a number of Freetronics Addressable Triple N-MOSFET modules being used to easily switch on and off lots of large, high powered LEDs for an art installation named “GRID I” and thought that this was too cool not to share! The art work was created by LOVOT LAB who have provided some impressive pictures and a video of the installation.

GRID I with the projects creators

Want to keep in the loop about the latest in home automation? Subscribing to SuperHouse Automation on YouTube is the best place to start!

Inspired to start work on this project? Are you working on a project you would like us to feature in this blog? The team at SuperHouse Automation would love to know! Tell us about it in the comments section below or on Facebook and Twitter.

cropped-SuperHouse-LogoOnly-512x512.jpg

Posted on 1 Comment

Power Monitoring with Arduino

Using a Clipsal Cent-A-Meter you can effectively monitor the power usage of different appliances. This is great, however the built in functionality can be rather limiting. You can not, for example track the power consumption of a device over time. Thankfully, combining this meter with Arduino can allow you to reach the power meter’s full potential!  Specifically, a 433MHz receiver can provide a communication bridge between the power monitoring system and an Ethernet connected Arduino allowing the power meter’s data to be sent into a SQL database for analysis and tracking. To find out more about this hack checkout the following link.

Power Meter

If you’re looking to work with your own RF wireless hardware, but don’t want to make your own receiver circuit – check out the Freetronics range of  315/433 MHz receiver shields:

Receiver

Apart from being idea for working with the various low-cost data links on the market, the shield can also be used to capture wireless weather station data, as described in the book “Practical Arduino“. For more information and ideas, check out the product page.

Want to keep in the loop about the latest in home automation? Subscribing to SuperHouse Automation on YouTube is the best place to start!

Inspired to start work on this project? Are you working on a project you would like us to feature in this blog? The team at SuperHouse Automation would love to know! Tell us about it in the comments section below or on Facebook and Twitter.

cropped-SuperHouse-LogoOnly-512x512.jpg

Posted on Leave a comment

Guitar Hero: Flamethrower Edition!

Although the popular Guitar Hero console game is already pretty cool, instructables member oswaldonfire has stayed true to his name by modifying his Guitar Hero game so that a set of flamethrowers is triggered with each in game button press. The result is nothing short of spectacular!

Flamethrower

The project is entirely controlled by an Arduino Uno and a number of relays which trigger the flamethrowers. If you want to find out more about how you can build this awesome project yourself checkout the following link or the video of the setup in action!

 Want to keep in the loop about the latest in home automation? Subscribing to SuperHouse Automation on YouTube is the best place to start!

Inspired to start work on this project? Are you working on a project you would like us to feature in this blog? The team at SuperHouse Automation would love to know! Tell us about it in the comments section below or on Facebook and Twitter.

Posted on Leave a comment

3D Printed Arduino Powered Robot

YouTuber Jaidyn Edwards has created a 3D printed two legged robot. If this wasn’t cool enough, the brain of this robot is the Freetronics LeoStick. Jaidyn’s robot is based of “BOB” an easy to make robot designed by Thingsverse user k120189.

BOB: The easy to build 3D printed robot

You can find full instructions on how to make the robot at the following link, and a video of Jaidyn’s robot in action below!

Want to keep in the loop about the latest in home automation? Subscribing to SuperHouse Automation on YouTube is the best place to start!

Inspired to start work on this project? Are you working on a project you would like us to feature in this blog? The team at SuperHouse Automation would love to know! Tell us about it in the comments section below or on Facebook and Twitter.

cropped-SuperHouse-LogoOnly-512x512.jpg

Posted on Leave a comment

Robotic Cat Laser

Does your pet cat love chasing around a laser light? For the cost of a couple of servo motors, an Arduino and a laser light you can provide your cat with endless entertainment.  The automated cat laser uses servo motors to constantly move the laser and entertain the cat, with no effort on your behalf! To find out how you can build your own cat laser robot checkout the instructable from joe at the following link.
Cat Bot

Want to keep in the loop about the latest in home automation? Subscribing to SuperHouse Automation on YouTube is the best place to start!

Inspired to start work on this project? Are you working on a project you would like us to feature in this blog? The team at SuperHouse Automation would love to know! Tell us about it in the comments section below or on Facebook and Twitter.

Posted on Leave a comment

Build an Underwater Drone

Although typically electronics and water do not mix, “sneel” the robotic fish is certainly an exception. The robotic fish is designed to emulate the motion of a real water snake and is perfect for underwater exploration. A number of Arduino Uno controlled servo motors undulate the robot to propel it through the water.

fcq7nouh5tu9que-medium

The applications of such a underwater drone are endless including collecting data about water quality or exploring confined underwater areas such as pipelines! If you want to learn how you can make your own “sneel” checkout the following link.

Want to keep in the loop about the latest in home automation? Subscribing to SuperHouse Automation on YouTube is the best place to start!

Inspired to start work on this project? Are you working on a project you would like us to feature in this blog? The team at SuperHouse Automation would love to know! Tell us about it in the comments section below or on Facebook and Twitter.

cropped-SuperHouse-LogoOnly-512x512.jpg

Posted on Leave a comment

Arduino Bluetooth Pairing

If you have been working on an Arduino project which requires Bluetooth then this tutorial is perfect for you.  One of the challenges of working with Bluetooth can be working through the intricacies of pairing your Arduino project with the computer of phone you are wanting to communicate with. Fortunately the team at Freetronics have put together a great guide of how you can pair the Freetronics Bluetooth Shield or Module to Mac, Windows or Linux devices. To get started checkout the following link.

Bluetooth

Want to keep in the loop about the latest in home automation? Subscribing to SuperHouse Automation on YouTube is the best place to start!

Inspired to start work on this project? Are you working on a project you would like us to feature in this blog? The team at SuperHouse Automation would love to know! Tell us about it in the comments section below or on Facebook and Twitter.

Posted on Leave a comment

Wireless Animatronics Hand

Who has not wanted build a robotic hand at some point in their life? Well this is exactly what instructables member njkl44 has done! Not only does this animatronics hand look totally awesome, it actually emulates the movements of the hand that is inside the “control glove”, making a spectacular effect.

Animatronic Hand

The control glove uses a number of flex sensors to determine the position of each finger and sends this information to the animatronic hand. If this sounds like the kind of project you would love to make you can find out more at the following link or in the video below.

Want to keep in the loop about the latest in home automation? Subscribing to SuperHouse Automation on YouTube is the best place to start!

Inspired to start work on this project? Are you working on a project you would like us to feature in this blog? The team at SuperHouse Automation would love to know! Tell us about it in the comments section below or on Facebook and Twitter.

Posted on Leave a comment

Arduino Arrays

This blog post is about learning how to use arrays with Arduino. Using arrays in your code can make your code faster and much more readable. For example, rather than defining a new variable for each pin used in your Arduino code, having an array allows you to assign these all to one array. To access each pin in the array you simply define which address of the array you would like to access. If you would like a more thorough explanation of how Arduino arrays work to implement them in your code make sure you checkout the following link.

Arrays

If you are thinking about getting started with Arduino, but don’t know where to get started, the Freetronics Experimenter’s Kit is a great way to learn the basics. The kit includes a wide range of parts including a servo, sensors, lights, buttons, a sound module and more. Importantly, a Freetronics Eleven Arduino-compatible board is included to ensure that the kit contains everything you need to get started with Arduino. All these great parts would be useless without some form of instructions which is why we have developed a comprehensive project and instruction booklet to get you started. Check out the product page to find out more.

Want to keep in the loop about the latest in home automation? Subscribing to SuperHouse Automation on YouTube is the best place to start!

Inspired to start work on this project? Are you working on a project you would like us to feature in this blog? The team at SuperHouse Automation would love to know! Tell us about it in the comments section below or on Facebook and Twitter.

 SuperHouse-LogoOnly-512x512