The Husqvarna Automower relies on a boundary wire to tell the mower when it needs to stop and turn around. This is *really* important if you have a drop-off in your garden, like I do at the moment! If the mower can’t detect the boundary, it could drive itself right over a tiny cliff, or into a pond, or something dangerous like that. So what happens if the power fails while the mower is operating, and the boundary wire stops working? Let’s try it and see what happens!
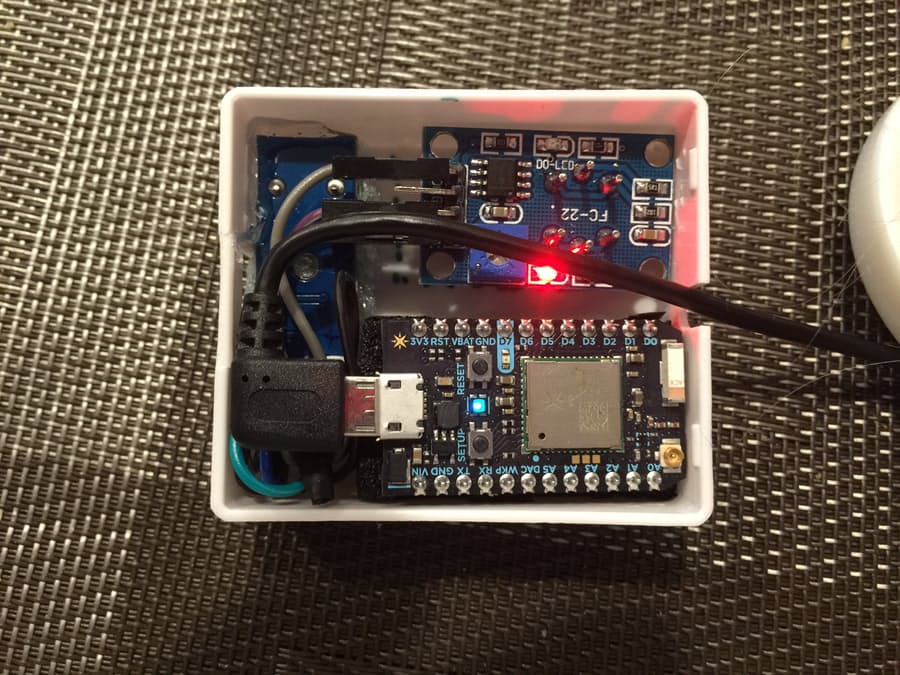
Undetected gas leaks can have extremely nasty consequences. Unlike a leaking tap, a gas leak can be at risk of explosion and in the case of carbon monoxide, poisoning and even possibly death. One way to avoid these consequences is to acquire a gas detector, or even better make your own! This is exactly what Stefan G has done using a Particle Photon, gas detector and a buzzer. To find out more about this project and to learn how you can make your own gas detector checkout this following link.
If you’re looking for a buzzer module to use in this project check out the Freetronics sound and buzzer module.
Although you can use the sound and buzzer module to generate sounds, it can also be used as a knock-detector input to sense events and react to them. This means it is perfect for this project! For more information and to order, please visit the product page.
Want to keep in the loop about the latest in home automation? Subscribing to SuperHouse Automation on YouTube is the best place to start!
Inspired to start work on this project? Are you working on a project you would like us to feature in this blog? The team at SuperHouse Automation would love to know! Tell us about it in the comments section below or on Facebook and Twitter.
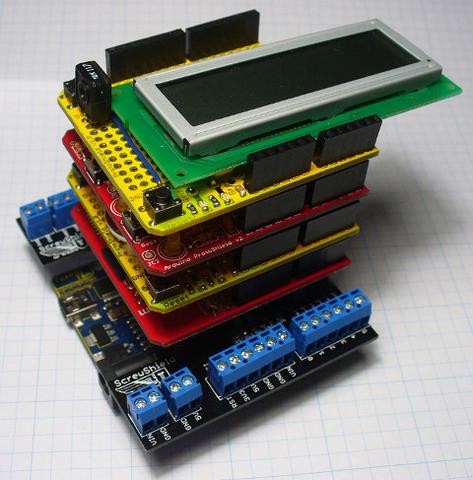
One of the great things about the Arduino is the ability to expand your board using shields which provide all sorts of additional capabilities. Interestingly, you can even “stack” shields so that you can have lots of different combinations of added features. Whilst it might look easy to simply stack shields together, not every combination of shields can be stacked together and there are a number of complications that should be considered. Fortunately our friends at Freetronics have put together a great tutorial which explains the ins and outs of stacking Arduino shields. This tutorial should provide you with really useful information if you have been stacking Arduino shields in your home automation projects. Checkout the following link to find out more.
Want to keep in the loop about the latest in home automation? Subscribing to SuperHouse Automation on YouTube is the best place to start!
Have you successfully stacked shields in the past? Are you working on a project you would like us to feature in this blog? The team at SuperHouse Automation would love to know! Tell us about it in the comments section below or on Facebook and Twitter.
The “Flic” Bluetooth button inspired me to create something similar for my home automation system. But instead of using BLE, I just connected a $6 remote control and matching receiver module to an Arduino-compatible board, so that whenever I press the button it publishes to MQTT.
That’s incredibly handy, because it means you can just stick a button anywhere you like and have it trigger arbitrary events in your home automation system. Make it turn off every light in the house, or order you a pizza, or whatever you like.
In this project, I combined it with the ambient tile display that I showed back in Episode #14 so that I would never forget to take out the rubbish bins.
Each week, the home automation system turns on one of the LEDs so that it reminds me to take out one of the bins. A red LED says it’s time to take out the bin with the red lid, and a blue LED means the bin with the blue lid.
Then, when I take out the bin, I just push the button attached to the bin and it tells the home automation system that I’ve done my job. The notification is cleared until next week, when it comes on again.
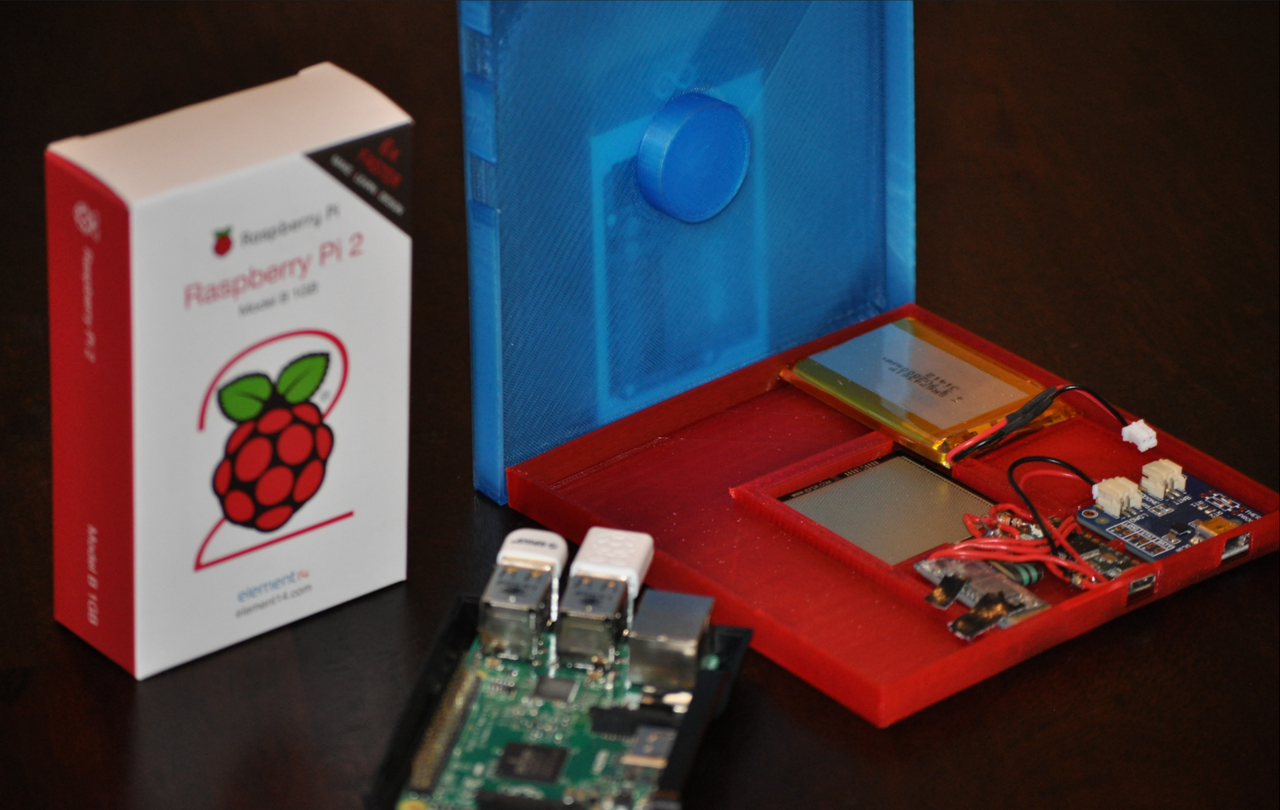
Have you ever thought it would be interesting to track food consumption? Foodie is an IoT project that tracks your food usage over time. The project uses a number of weight sensors connected to an Arduino and Raspberry Pi to monitor the contents of your pantry or fridge. By creating a network of weight sensors the “Foodie” system can track the consumption of individual items and link this data to individual barcodes so that it can make reccomendations for your shopping list! To get started with this project check out the following link.
If you are working on a projected that requires interaction between an Arduino and a Raspberry Pi the team at SuperHouse Automation recommends the Freetronics PiLeven. The PiLeven is a 100% Arduino Uno compatible board that is designed to fit perfectly onto your Raspberry Pi, adding a huge amount of potential functionality to your Raspberry Pi. For more information visit the PiLeven webpage.
Want to keep in the loop about the latest in home automation? Subscribing to SuperHouse Automation on YouTube is the best place to start!
Are you are thinking about making your own thermal imaging camera? Have a project you would like us to feature in this blog? The team at SuperHouse Automation would love to know! Tell us about it in the comments section below or on Facebook and Twitter.
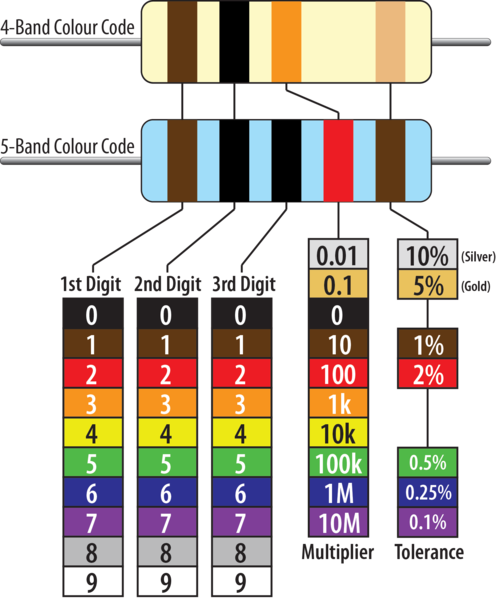
Resistors are a fundamental part of almost all electronic circuits. Regardless of which project you are working on you will need to make sure that you are using the right resistors! To help you learn about how to determine the value of your resistor using the colour bands that are present on through hole resistors, our friends at Freetronics have put together a comprehensive tutorial. You can check it out at the following link.
Want to keep in the loop about the latest in home automation? Subscribing to SuperHouse Automation on YouTube is the best place to start!
Working on your own home automation projects? The team at SuperHouse Automation would love to know! Tell us about it in the comments section below or on Facebook and Twitter.
I’ve had the Husqvarna Automower for just a few weeks, but we’re already seeing the benefits! The area maintained by the Automower always looks neat, while the area outside the boundary wire turns into a miniature jungle within a few days of being mowed.
Why mow the lawn yourself, when you can have a robot do it for you?
Husqvarna have very kindly supplied me with an Automower 320, which is a mid-range robot lawnmower that’s suitable to mid to large size suburban gardens.
Normally I like to focus on low-cost, DIY home automation projects, but this is just too good to pass up! In this episode I explain how the Automower works, how it’s different to a traditional manual mower, and (most importantly!) how my pets react to it.
In future episodes I’m going to try some creative things with the Automower. I can’t go totally crazy because the mower is supplied by Husqvarna as part of a pilot program and I’m not allowed to open it or modify it (yet!) but there are still some fun things we can do without voiding the warranty or having it repossessed.
Over the years I’ve slowly added individual IP cameras, both inside and outside the house. However, I’ve run into limitations such as how to store footage from the cameras for security purposes, and how to display multiple cameras simultaneously. I’ve used workarounds for these problems but it’s time to try out a proper camera system, rather than a collection of separate cameras.
I installed an ANNKE system a DVR and cameras to replace 4 of my existing IP cameras, to test how well it works. I also installed long video cables and a wireless mouse so I could mount the DVR inside my ceiling and display the camera feed on a couple of LCD TVs, and tested BNC-to-UTP adapters to run Cat-5 cable to a distant camera.
Unfortunately I discovered that the DVR requires Windows for network access, because it relies on a plug-in that doesn’t work on Mac or Linux. That means I had to run long video cables to the TVs that I use to display the live feed from the cameras. The end result is great, but it’s not how I intended to set it up.
There are a bunch of other packages as well. The AUD price seems to vary: I think it’s generated by converting from USD at whatever the daily exchange rate is, so it’s different now to when I got mine.
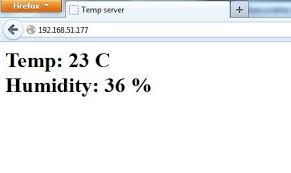
If you want to take your projects to the next level and add online capabilities this tutorial is for you. Although it is relatively simply to connect up a sensor to your Arduino and read sensor values onto an LCD or your serial monitor, making these sensor values accessible over the internet adds a whole new level of complexity! With this tutorial you can learn how to create your own online thermometer. To get started checkout the following link.
If you are looking for a temperature sensor to use in this project the team at SuperHouse Automation recommends the Freetronics temperature sensor module. To find out more about check out the product page.
Want to keep in the loop about the latest in home automation? Subscribing to SuperHouse Automation on YouTube is the best place to start!
Working on your own home automation projects? The team at SuperHouse Automation would love to know! Tell us about it in the comments section below or on Facebook and Twitter.