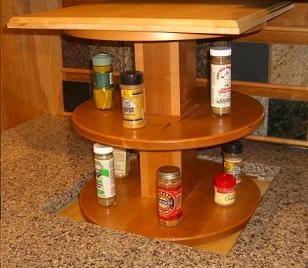
Have you ever wished that with the push of a button you could have your spice rack pop up out of your bench? Probably not! However at SuperHouse Automation we still think this is a very intriguing and unique project. Inspired by a customer request, Firgelli Automations have developed a kitchen modification allowing you to have a pop-up shelf on your bench top.
The shelf could be used for all sorts of things such as a microwave, toaster, wine, cutlery or spices and would be a really novel addition to any kitchen. The project uses an actuator to “pop up” the shelf and when hidden you wouldn’t even know that the shelf was there. Although not covered in the instructable, you could very easily control the lifting mechanism from a microcontroller such as an Arduino or the D1 Mini giving you even greater flexibility.
Want to keep in the loop about the latest in home automation? Subscribing to SuperHouse Automation on YouTube is the best place to start!
Are you are thinking about making your own hidden kitchen shelf or do you have a project you would like us to feature in this blog? The team at SuperHouse Automation would love to know! Tell us about it in the comments section below or on Facebook and Twitter.
Do you ever find yourself inside your ceiling or under the floor working on your home automation system, and need to SSH to a remote machine or re-flash an Arduino?
Sure, you could drag your laptop under there with you, but I don’t want to have my expensive laptop lying around in the dirt or insulation.
I may have found the answer.
C.H.I.P. and Pocket C.H.I.P. will be available soon from getchip.com.
The following sequence got everything working for me. You may want to do things a little differently, for example by managing the python-serial extension using Pip or storing your sketches in a different location. That’s totally up to you, just make sure you alter the paths shown below as necessary.
Start by making sure your package list is up to date, and that you have the latest packaged Arduino and Python serial extension installed on your C.H.I.P.:
There’s nothing unusual about the Blink sketch. It’s just standard Arduino code that you could compile with the regular IDE. The magic is invoked through the Make file.
Open the Make file in your favorite text editor, and you’ll see that it looks like this:
BOARD_TAG = uno
ARDUINO_LIBS =
include ../../Arduino.mk
The “BOARD_TAG” value specifies that you want to compile it for an Uno or compatible board. You can change this to match other boards found in the Arduino board hardware definition file, which is located at /usr/share/arduino/hardware/arduino/boards.txt. In that file you’ll find other handy board types that I’ll list at the end. For now, we’ll assume that you’re using an Uno and leave that unchanged.
The “ARDUINO_LIBS” value allows you to specify a path to your own custom libraries in case you need them linked during compilation. We’ll ignore that for now, so leave that line unchanged.
The “include” line is a problem. It assumes the project is still located in the shared location where it was installed by the package, but we’ve made a copy in our local sketchbook. To fix that, change the “include” line to read:
include /usr/share/arduino/Arduino.mk
There are many other options you can add to the Make file to override the default settings within Arduino. For example, you can define the path to a specific version of AVRDUDE if you want to bypass the version that’s bundled with the Arduino environment.
But for a minimal example, you don’t need to change anything else.
Now you can compile the sketch, and upload it to your Arduino. To compile the sketch without attempting to upload it, just type:
make
That’s it! Can’t be much simpler. If there are any compilation errors, you’ll see them in the terminal.
To upload (and automatically compile if necessary) make sure your Arduino is plugged into your Pocket C.H.I.P. using a USB cable, and type:
make upload
You’re all done! Your sketch should now have been uploaded to your Arduino.
There are other commands available as well. Check out the Arduino-MK documentation for more information:
These are all the board tags list in the standard /usr/share/arduino/hardware/arduino/boards.txt file:
uno: Arduino Uno
atmega328: Arduino Duemilanove w/ ATmega328
diecimila: Arduino Diecimila or Duemilanove w/ ATmega168
nano328: Arduino Nano w/ ATmega328
nano: Arduino Nano w/ ATmega168
mega2560: Arduino Mega 2560 or Mega ADK
mega: Arduino Mega (ATmega1280)
leonardo: Arduino Leonardo
esplora: Arduino Esplora
micro: Arduino Micro
mini328: Arduino Mini w/ ATmega328
mini: Arduino Mini w/ ATmega168
ethernet: Arduino Ethernet
fio: Arduino Fio
bt328: Arduino BT w/ ATmega328
bt: Arduino BT w/ ATmega168
LilyPadUSB: LilyPad Arduino USB
lilypad328: LilyPad Arduino w/ ATmega328
lilypad: LilyPad Arduino w/ ATmega168
pro5v328: Arduino Pro or Pro Mini (5V, 16 MHz) w/ ATmega328
pro5v: Arduino Pro or Pro Mini (5V, 16 MHz) w/ ATmega168
pro328: Arduino Pro or Pro Mini (3.3V, 8 MHz) w/ ATmega328
pro: Arduino Pro or Pro Mini (3.3V, 8 MHz) w/ ATmega168
atmega168: Arduino NG or older w/ ATmega168
atmega8: Arduino NG or older w/ ATmega8
robotControl: Arduino Robot Control
robotMotor: Arduino Robot Motor
You can also use custom board profiles, but that’s beyond the scope of this post! Most common Arduino compatible boards match something on this list. For example, the Freetronics EtherMega operates just like an Arduino Mega with a 2560 processor, so you’d select “mega2560” as the BOARD_TAG in the Make file.
Update 6 Jan 2017: Quick Setup Script
My friend Alec has written a script to simplify the process of installing the packages I used in the video and also to fix a few things he doesn’t like about the default setup. His script installs the necessary packages, blocks root access to the terminal and SSH, locks the root account, changes the default password, changes the hostname, and forces public key authentication via SSH. Definitely worth a look:
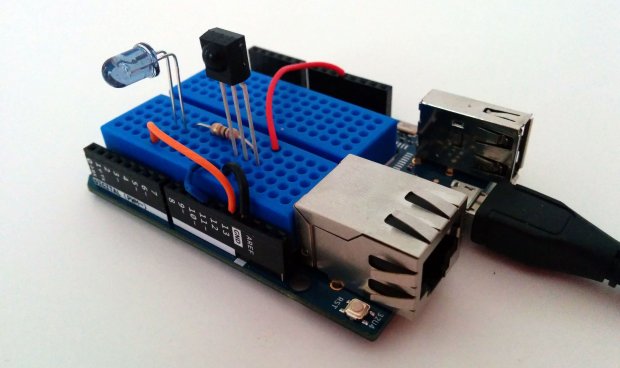
With this clever project from Tony DiCola you can overcome the confusion of having multiple remotes by combining them all into an Arduino powered universal remote. The remote is built using a number of common parts including a IR led and an IR receiver. The IR receiver is used to decode the signals from the original remotes so that they can be sent to your entertainment devices by the IR led on the universal remote. When set up, the universal remote can provide an interface between your various entertainment devices and your smartphone allowing you to control all of your devices from your smart phone.
This is a perfect project to integrate into your home automation system allowing you to control your TV system from any smart device and even schedule recording or automatic channel switching and implement any other number of useful features.
To get started on this simple but useful project, check out the following link.
Subscribe to SuperHouse Automation on YouTube to learn more about creating internet of things devices! Considering creating your own universal remote? The team at SuperHouse Automation would love to know! Let us know in the comments section below or on Facebook and Twitter.
There is a certain satisfaction that can only be found when enjoying a well earned beer. However, not even this compares to the satisfaction of enjoying a beer that you worked hard to brew yourself! With this Arduino powered home brewing system from Arzaman, you can autonomously brew your beer using equipment you have also designed and made yourself.
The home brewing system allows you to fully automate the beer production process using an Arduino Uno, and a shield that connects the Arduino to the heating element, pump and LCD menu system. The system can be configured to provide you with an easy to follow brewing set up process, and then will automatically brew your beer, prompting you along the way if you need to do something manually. Furthermore, you can easily customise important parameters and save recipes for future use. The entire project is open source and is known as Open Ardbir. To find out more check out the following link. This project is a great example of the many possibilities of Arduino automation! If you are looking for an Arduino to use in this project SuperHouse Automation recommends the Freetronics Eleven Arduino compatible board.
Want to learn more about awesome automation hacks like this? Subscribing to SuperHouse Automation on YouTube is the best place to start!
Thinking about making your own automatic brewing system? Have a project you would like us to feature in this blog? The team at SuperHouse Automation would love to know! Tell us about it in the comments section below or on Facebook and Twitter.
Do you spend a lot of time opening and closing your blinds each day? With this project from FreedomToCreate you can create your own automated blind controller which allows you to open or close your blinds based on a schedule, current temperature or outdoor light levels. You can even have the added flexibility of controlling your blinds from your smartphone. Although it sounds like a relatively minor “chore” it is amazing how much time you could save across an entire year if you didn’t have to worry about your blinds! You could very easily incorporate this into an existing smart home system so that you can control everything in one place. To get started on this handy project check out the instructable.
Want to learn more about awesome automation hacks like this? Subscribing to SuperHouse Automation on YouTube is the best place to start!
Thinking about automating your own blinds? Have a project you would like us to feature in this blog? The team at SuperHouse Automation would love to know! Tell us about it in the comments section below or on Facebook and Twitter.
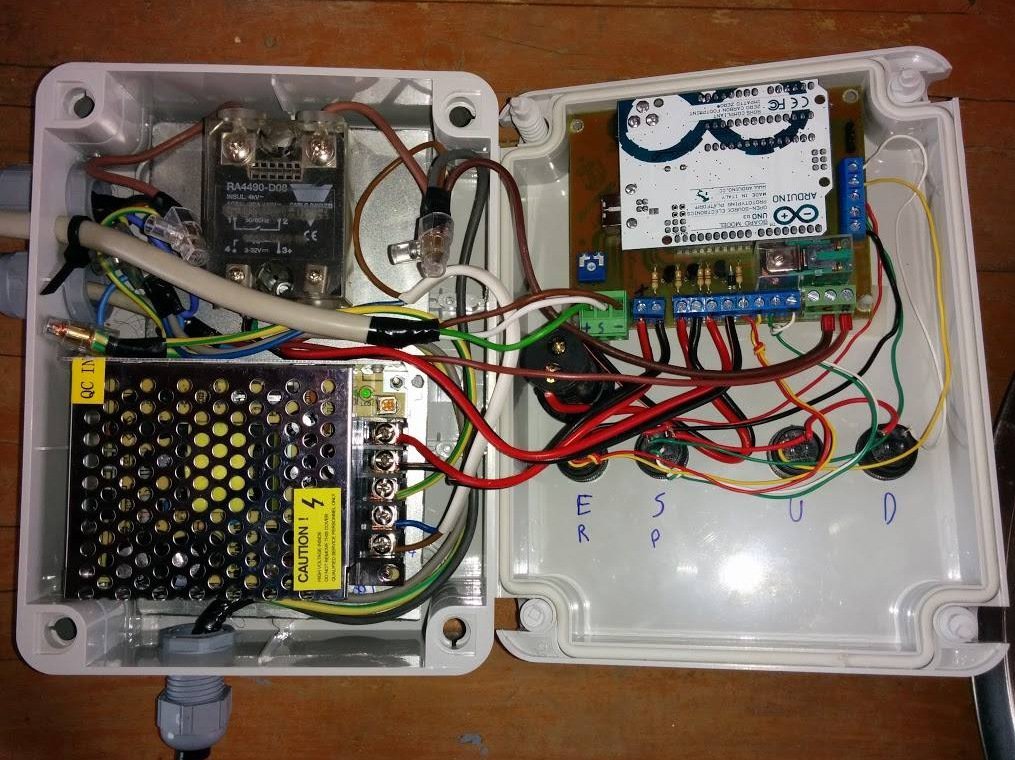
Do you ever find yourself arriving home from work to a cold house? With this project from kohleick you can send your heating system an SMS while you are driving home, and arrive to a toasty warm house. The controller runs off an Arduino Uno and custom shields which control timing, temperature measurement and telecommunications. Kohleick has designed the controller to fit unobtrusively into a picture frame. The controller has full functionality including six operating modes, temperature measurement and full SMS control. Additionally, the heating controller features a phone book which specifies which numbers can send commands to the heating system.
This is a great project to integrate into a home automation system and could potentially help you save big on energy bills. Although it is quite a complicated project, the instructions are well set out and explained. To get started check out the following link.
Want to learn more about awesome automation hacks like this? Subscribing to SuperHouse Automation on YouTube is the best place to start!
Thinking about making your own automatic brewing system? Have a project you would like us to feature in this blog? The team at SuperHouse Automation would love to know! Tell us about it in the comments section below or on Facebook and Twitter.
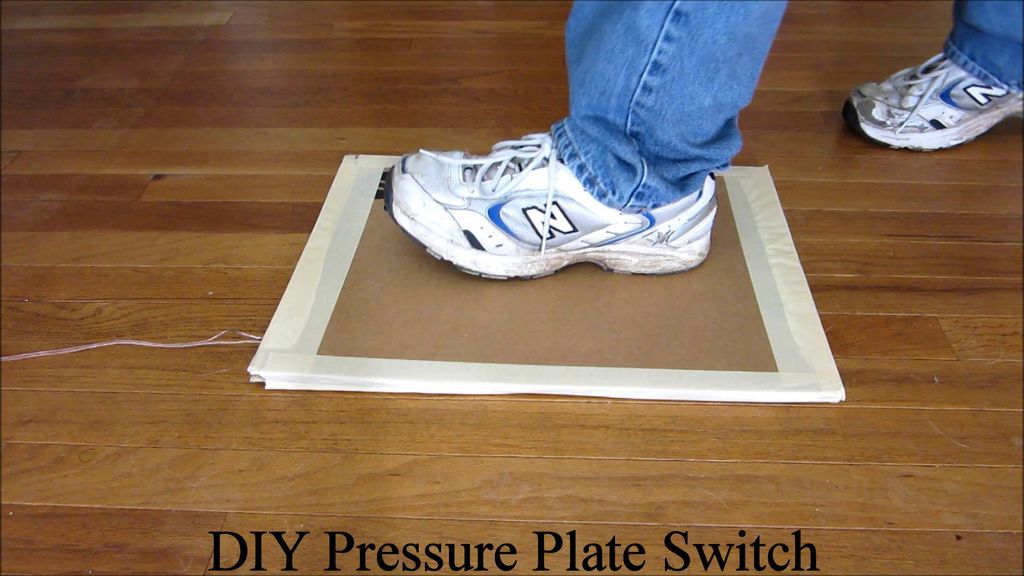
This is a very simple project which could be used for an infinite number of different purposes! You could use your pressure plate switch to add perfect timing into your haunted house, automatically trigger your doorbell when someone stands on your doormat, track the presence of mail or parcels, or even set up your alarm clock to only turn off when you get out of bed and step on the switch!
The possibilities are really limited to your imagination. A project like this could make a really great input device for your home automation system. The best thing about this project is that all you need to get started is some wire, aluminium foil and cardboard! To get started making your own pressure plate check out the following instructable from Jason.
Want to learn more about awesome automation hacks like this? Subscribing to SuperHouse Automation on YouTube is the best place to start!
Thinking about making your own automatic pet feeder? Have a project you would like us to feature in this blog? The team at SuperHouse Automation would love to know! Tell us about it in the comments section below or on Facebook and Twitter.
Want to start gardening but don’t trust yourself to regularly water your plants? With the “Garduino” from Luke Iseman, you can program your Arduino to help you out! This project allows you to automate watering, supplementary lighting, temperature warnings and more, using a number of sensors. All of the parts used in this project are readily available and the instruction guide is sure to help you create plenty of juicy vegetables in no time (and with very little effort on your behalf). More information can be found at the following link.
If you are looking for a temperature sensor for your Arduino garden, SuperHouse Automation recommends the Freetronics temperature sensor module. The module is accurate to 0.5 ℃ and features a wide temperature range, mounting holes and comes with full code examples. To find out more check out the product page.
Want to learn more about awesome automation hacks like this? Subscribing to SuperHouse Automation on YouTube is the best place to start!
Would your neglected veggie garden benefit from some automation? The team at SuperHouse Automation would love to know! Tell us about it in the comments section below or on Facebook and Twitter.